XC Vinyl Logo Project
|
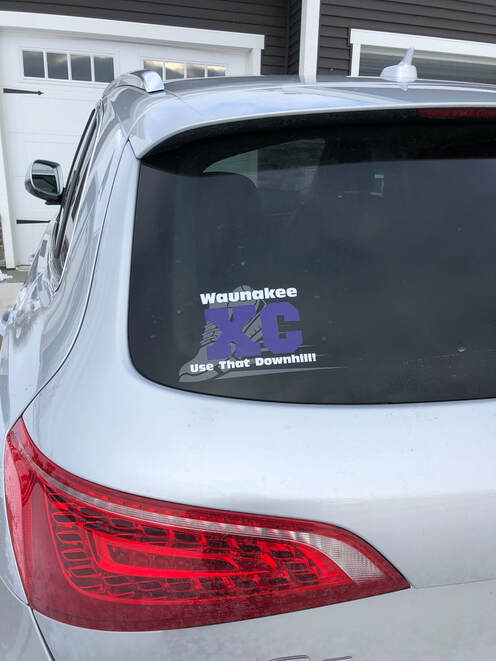
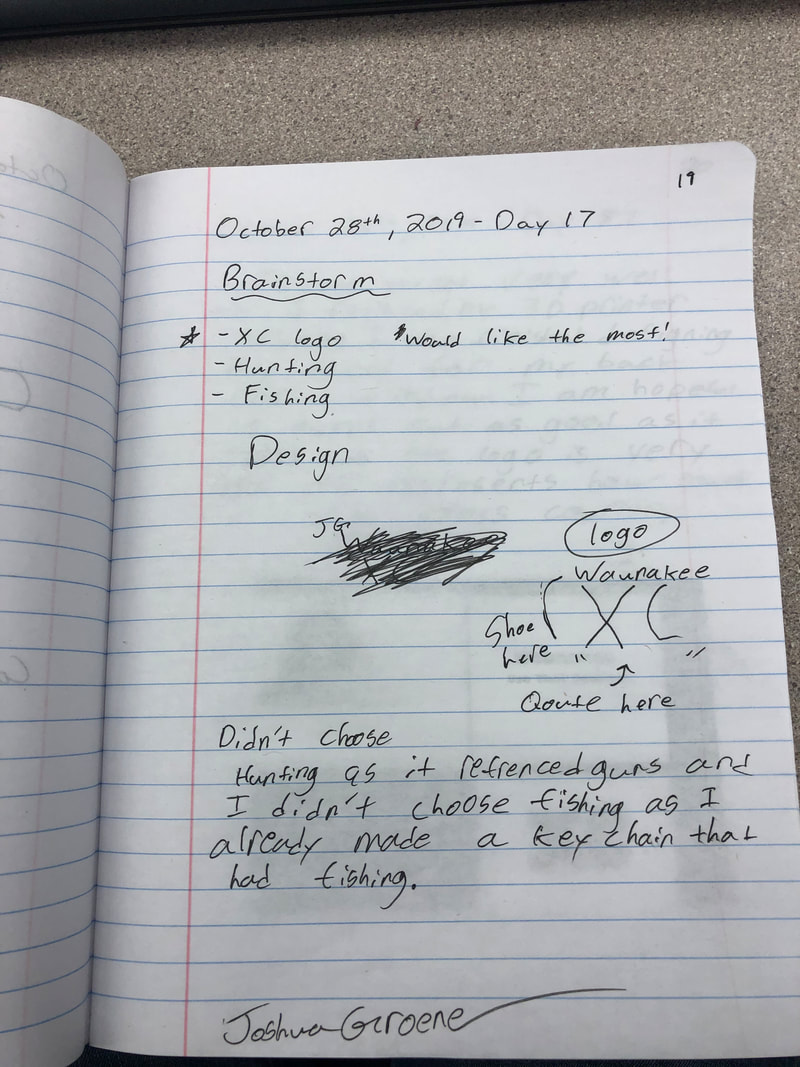
The idea of creating a decal for my back car windshield was my main idea. But the hard part was figuring out what I want to put on the back window. In the notebook to the right you can see I had 3 ideas but I narrowed it down to the XC because I love running.
|
|
The Process
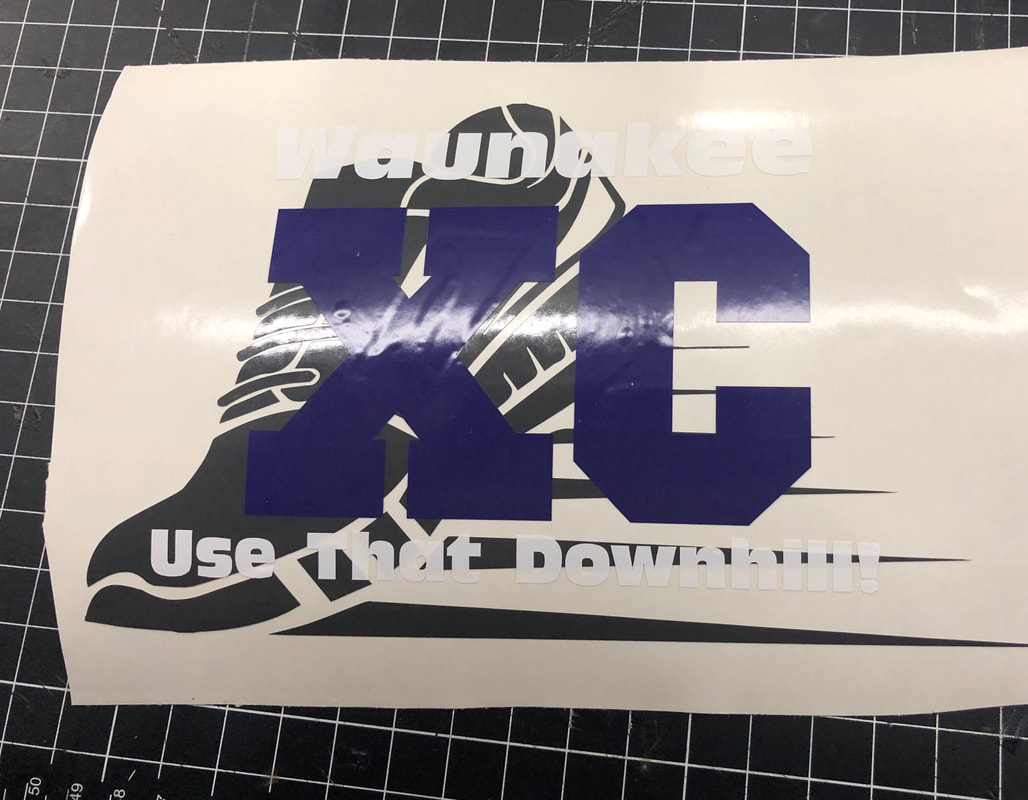
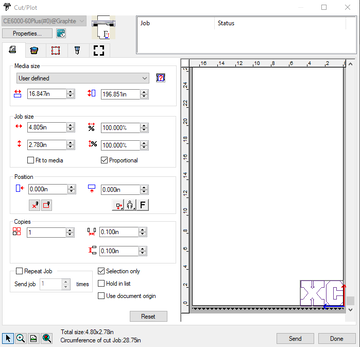
For this project, most of the labor was done manually. But we did have to cut it out on the vinyl cutter and when you going to cut you need to line up the vinyl in the cutter and put the wheels down on the vinyl near the edges. At this point you then have the vinyl cutter measure your vinyl and then send your design to the cutter. After the design is cut use the knife and cut the vinyl off from the roll. Then it is time to weed and transfer, for the steps to do this check the Illustrator page for the steps. After the vinyl is transferred it is ready to be put on to the team of choice, back windshield of a car. Apply great pressure again and watch as it stick when you peel the tape away!
|

|
Summary
|
For this rotation I learned how the decals are made and how they are placed on to objects. It was may more rigorous than I had thought! But the end result is worth it as you get a professional decal that looks that you bought it instead of making it.
|
